Creating water in a diorama
The methods and materials used to replicate water in modeling are as diverse as the shapes and forms nature uses to display water. I almost exclusively use clear casting or epoxy resins, preferably products sold by Faller (A:B-1:1) or SMOOTH-ON (Chrystal Clear, A:B-1:1). Also, I generally use resins with a binder-to-hardener mixing ratio of 1:1, because these are easiest to work with. Important: be shure you use UV resistant materials, to avoid unwanted surprises, because some of the resins tend to turn muddy after a while. Tom y opinion most of the other commercially available materials are less suitable because they either do not get hard , they soften again with time, or they become brittle. Water glass or plastic films will not let you achieve the desired optical effects. Occasionally, I have seen water surfaces made of plaster of Paris covered with acrylic paints, but these are not nearly as realistic as epoxies. Whatever the type of resin you are using, there are some general rules that apply to all of them: The area to be poured has to be dry and, most importantly, "water" tight. After mixing, leave the resin to rest for some time to allow air and other gases to escape. You may even want to use a vacuum device for degassing. Then slowly pour the resin into your model. Considerable heat develops as the hardener comes into contact with the epoxy. Therefore, be sure to never add layers that are deeper than 6 mm. Do not add an additional layer until the previous one has cured completely. If you do, tension cracks may develop, because each layer will have a different drying time. The air and gas bubbles that form as the resin cures can be removed by poking with a needle. Unless you disturb the resin to build the effect of a wavy surface, all types of resins will ultimately cure into level surfaces. With one small but notable exception: When recreating a river, for example, you will notice a small elevation along the edges, because the resin creeps up along the bank, leaving an unrealistically glossy area. To achieve a level transition between the water surface and the edge of a pond, the bank of a river, or a sandy beach, you will have to rework these areas. To do so, cover the water surface with masking (e.g., Revell Colour Stop) along the bank, leaving a clearance of about 2 mm between the bank and the masking. Then, touch up the area between the bank and the masking with the materials you used to build the shore, bank, or beach. Finally, carefully remove the masking before the material is completely dry.
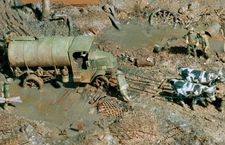
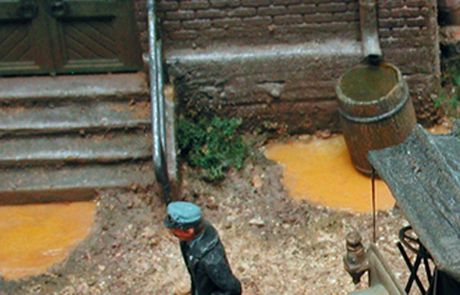
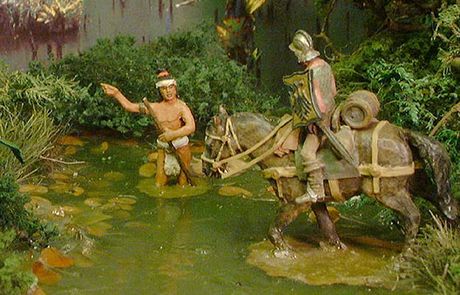
MURKY WATER (swampy rivers, ponds, puddles)
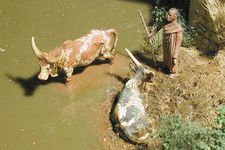
The resin by FALLER as well as epoxy resins are somewhat murky by nature and they turn yellow with time because they are not UV resistant. That’s why they are perfect for replicating murky waters. Depending on the type of water you want to depict, you can also dye the resin by adding green or brown polyester paint. Because you cannot see to the bottom of muddy water, you will not need to pour more than one layer of about 6 to 8 mm.
To cover up patches of resin creeping up, you can also add shrubs or bushes along the edges. Hairs from paint brushes or plumber’s hemp are perfect to imitate grass or reed jutting out of the water. I prefer hemp because it is not as stiff as brush hairs. To get a realistic look, simply glue the grass onto the water surface with white glue after the resin has cured; if you install the grass or reed before pouring, the resin will creep up along the hairs, resulting in an unrealistic look.

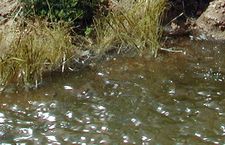
CLEAR WATER (rivers,brooks,lakes)
Because many clear waters have a slightly yellowish appearance, you can again use resin by FALLER. When recreating clear waters, however, you will have to do some groundwork before you pour the water by working sand and gravel, dry twigs, and dusting or flocking materials into the base. You can then apply different shades of dark and light greenish-brown paint to achieve the illusion of depth. This effect will be intensified by the refractive power of the resin.
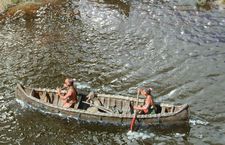

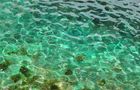
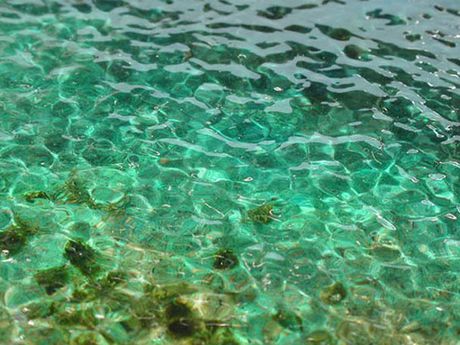
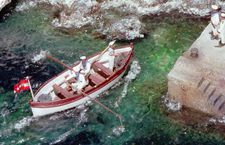
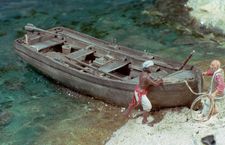
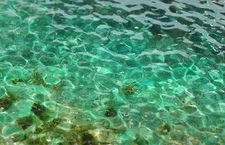
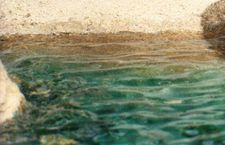
However, to depict absolutely clear water, such as a mountain brook or ocean water, my favorite product is one by SMOOTH ON, i.e., CRYSTAL CLEAR. It is UV resistant and does not lose its clarity. To recreate the bottom of the sea, you can use materials such as sand, flocking material, moss, and stones, toonly name a few - there are absolutely no limits to your creativity.
When depicting coastal areas, you will not only incorporate some authentic maritime vegetation, you will also want to imitate the transition from shallow to deep waters. To accomplish this, paint the ground in colors ranging from turquoise to dark blue. Again, the resin layer will intensity the appearance of depth. You may even want to dye the resin itself with small amounts of paintto create beautiful color reflexions, especially when doing sandy beaches or icebergs.

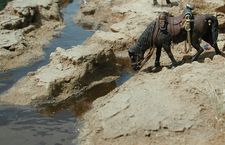
PUDDLES and MUDHOLES
To create puddles or mudholes, you can again use the techniques I described above.
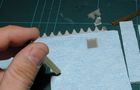
An alternative method, however, is to embed small pieces of plastic foil, cut to size,
into the still soft groundmass of the diorama. Before you embed the foil, color the
bottom side with earthy paint to give it a muddy appearance. Again, whichever method
you choose, finish your puddle by applying the masking method along its edges.
If you opt for resin, you can use the tip of a paintbrush to have slight amounts of
brown paint “melt” in your water puddle to imitate churned-up mud, rust, or dirt.
Because the edges of puddles and mudholes tend to be wet and oozy, you should
finish off your puddle by applying small amounts of varnish or a thin layer of diluted
resin along the edges to give them a glossy appearance.
WAVES, MOVING WATER
Most resins take several hours to cure completely. However, the curing process starts as soon as you mix the two components together. Once most air and gas bubbles have escaped and the resin has had some time to set, you can start sculpturing the wave structures into your water model. To create long waves, use a fork, toothpick, or the handle of a brush and slur them back and forth through the gelling resin. You will
have to keep stirring back and forth, over and over, until the resin begins to gel and
no longer levels off. To create smaller waves, I use the Nikolai Silicone Wave Stamp.
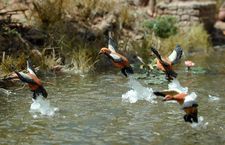
WHITECAPS AND FOAMING WATER
Finely crushed salt and various types of powder snow but also resin filler and christmas decoration stuff, mixed with white glue, give a realistic illusion of foaming water. Once the foam has dried, you should finish it with clear varnish or, better still, with Christal Clear.
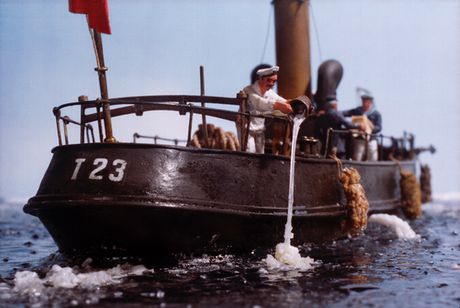
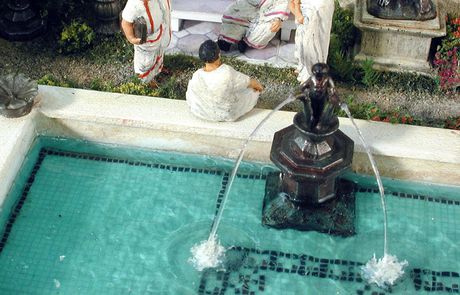
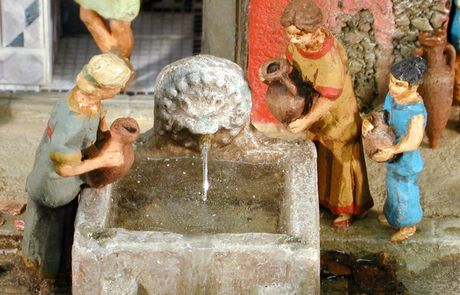
To create squirts of water, such as water gushing out of a fountain, water pipe, or the cooling water outlet of ships, start by bending a transparent, heated, round-diameter casting branch or a thin stick of clear plastic into the desired shape and coat it by applying the foam mixture layer by layer. The clear plastic stick can, of course, be left untreated.
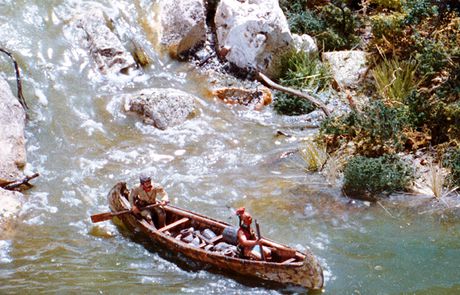
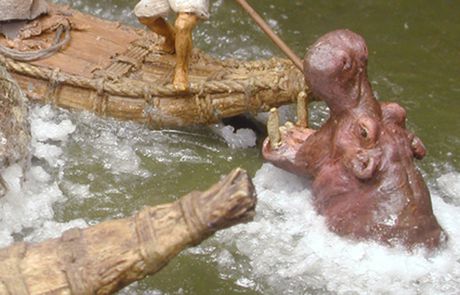
OBJECTS IN THE WATER
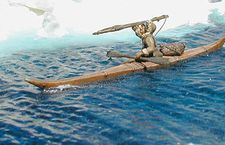
As mentioned earlier, resin will creep up along objects you place into your dio design before pouring the resin. Therefore, to create an object floating on the water, I usually cut off the part that is immersed and then only glue the visible part onto the cured water surface.
To blend your object into the water area, you can apply some foam around it. This is especially effective when you are using ships incorporated into your display, particularly to create nose waves. Also, foam applied along coastal strips and sandy beaches will give the effect of a gentle surf. If you also want the immersed part of your object to be visible through the water surface, you will have to pour in the entire object and simply bear with the resin creeping up.
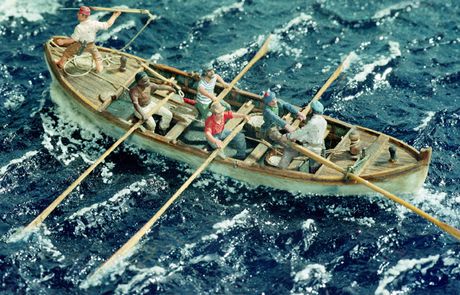
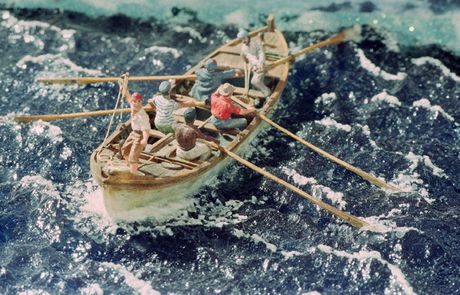
HEAVY SEA and WATERFALL
HEAVY SEA
If you find that the waves you created with the method I described earlier are not high enough for your concept, you can use a method that is as complex as it is expensive. This technique, which should only be used for pure water dioramas, leads to absolutely astonishing results.
Start by preparing a leakproof, relatively high wooden frame. Fill the frame with plaster of Paris or the like and model the desired seaway. This is best accomplished with a large brush. It is important to remember that waves normally follow a certain rhythm.
After the plaster of Paris has dried, fill the mold with silicone rubber to prepare a
negative mold. Be sure to coat the entire surface with rubber before pouring the
rubber to avoid the formation of air bubbles. Remove the hardened mold and pour it with resin dyed with blue paint. When the water has hardened, carve out little holes to
fit in objects, such as ships. Apply foam around your objects to cover up the borders,
and paint the bottom side of the base dark-blue. Finish your wave tops by adding
crests and whitecaps and coat the entire display with brilliant varnish.
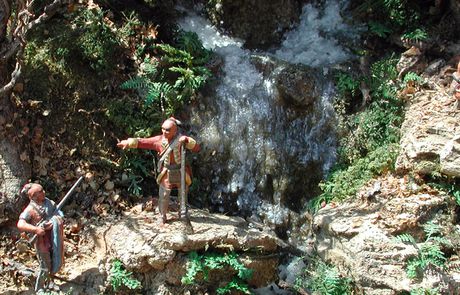
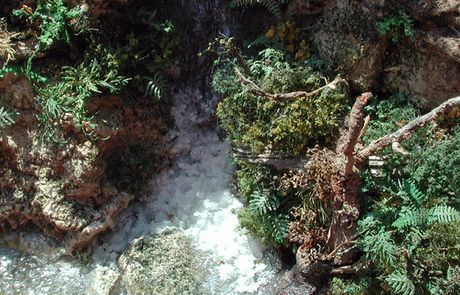
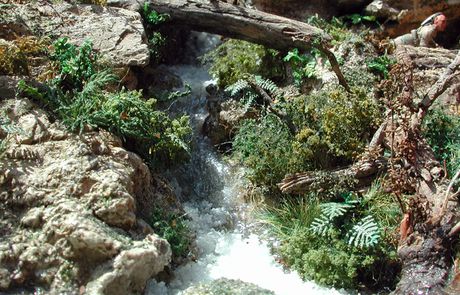
WATERFALL
To replicate waterfalls, work small basins into the ground at different levels as you
create your landscape. After completing the terrain and riverbed, pour resin into the
basins. Once the resin has set, you can pull the gelled resin from the higher down to
the lower basin with a fork or a brush handle, modeling the structures of streaming or flowing water into the material. Then apply your foam mixture to add thefinishing
touches.
Another technique is to leave the resin in the mixing cup until it starts gelling. Then
quickly pour the gelled resin into the diorama. However, this technique requires quite some experience with working with this often unpredictable material.
To replicate cascading water, you can use silicone products such as are used for
sealings in bathrooms. Place long squeeze-outs of silicone where you want the
waterfall to be and model and sculpture them as desired. To achieve the appearance
of water in free fall, simply press the silicone squeeze-outs onto transparent sheeting, model them, and install them in your diorama. This material takes a long time to dry, so you can take your time modeling your waterfall.
GOOD LUCK!